This article helps you to Add Navigation Menu in WordPress the Right way.
Create Menu in WordPress is made easy with this guide. When you follow this article you will be able to add navigation menu in WordPress.

This solution is tested using Genesis theme.
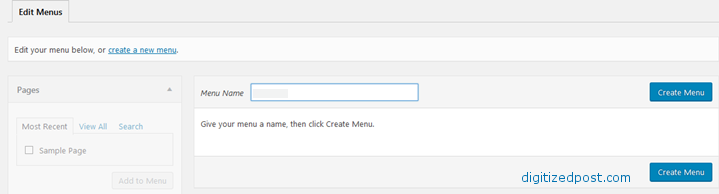
In WordPress Navigate to Appearance > Menus > Edit Menus > Menu Name. Add 'After Header Menu' and Create Menu. In Menu Settings > Display Location Check the After Header Menu option.
Now go to Pages and create a New Page like 'About xyz'. xyz could be your website name.
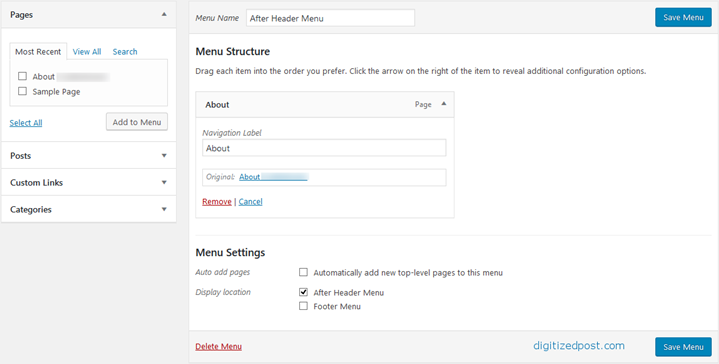
Now navigate to Appearance > Menus > Edit Menus and Expand Pages and Check 'About xyz' option and Click Add to Menu. Now the About page will be added to After Header Menu menu name under Menu Structure. Change the About xyz to About in Navigation Label. Other Wise the Menu will display the page name. Click Save Menu to save your changes.
To View your changes visit to Home page now to see the menus are properly placed after Header Menu Section.
You can Add Pages, Posts, Custom Links and Categories to Menu. Don't forget to click Save Menu every time after you add page, post or categories to Menu.
Menu Structure Displays the order of Menu. It is by default arranged in alphabetical order. You can drag the menus to change the order.
Note : If Menu is already added in Header Right Widget this solution will add Menus below Header Right Section. If Header Menu Section is not there also this solution will work.