For running java programs you need a JDK. JDK means Java SE Development Kit or Java Development Kit.
The latest version of Java or JDK is 16. We have downloaded Java SE 16.0.2 development kit which is the latest release under the Java SE 16 Platform.
Step 1 Download JDK
Go to https://www.oracle.com/in/java/technologies/javase-downloads.html.
Download JDK 16 for windows or any version based on your requirement. For any version, the installation steps will be the same.
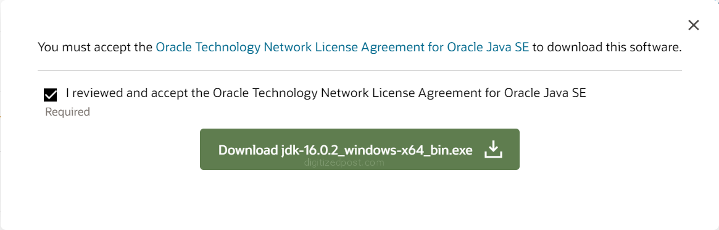
For Direct download of JDK 16 go to the https://www.oracle.com/java/technologies/javase-jdk16-downloads.html URL. Accept the License agreement and Select the jdk-16.0.2_windows-x64_bin.exe executable Windows x64 Installer file for download.
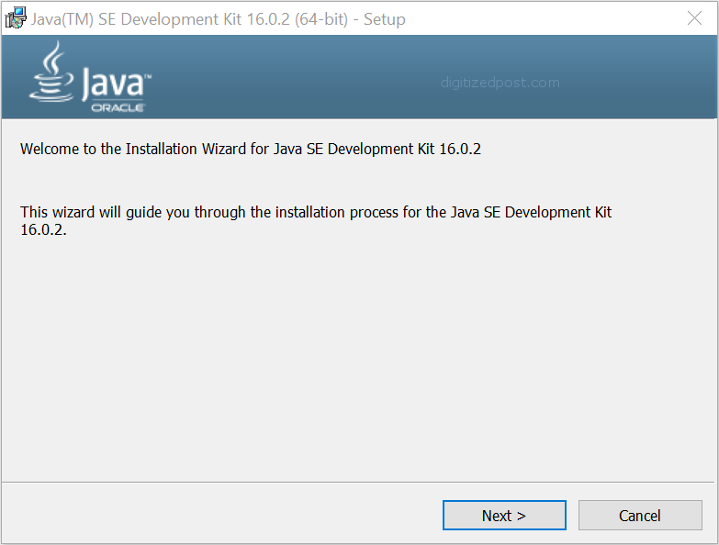
Step 2 Install JDK
On clicking the executable file the installation wizard will popup. Click Next.
Wait until the setup status is in progress. This may take few minutes.
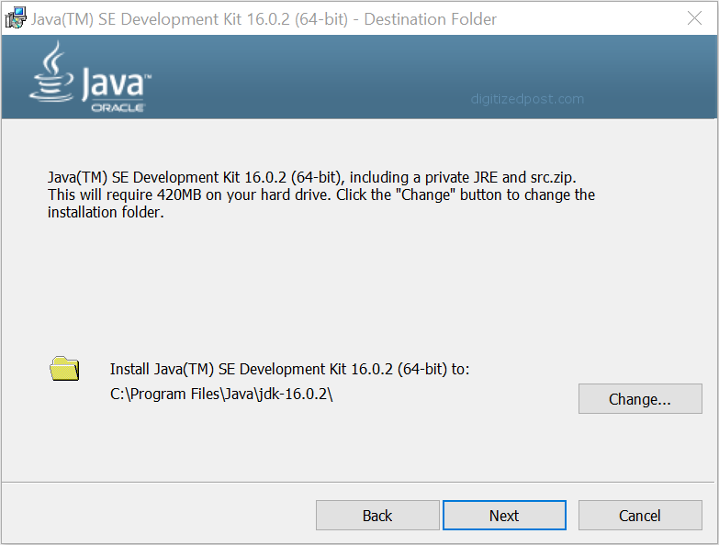
Step 3 Choose Destination Folder
Choose the destination folder. Click Next.
The default destination folder in windows installation will be C drive. It is not recommended to install any development software under C drive because when you format or reinstall the C drive all the files and folders under the C drive will be erased and overwritten with new system software. If it is installed in C drive and when there is a new update available, JDK will be automatically updated to the new version. If you point the JDK installation path in eclipse editor settings you need to change it every time when there is a new JDK update. In non-personal computers, if the admin rights are not enabled by your organization, you can't disable the automatic updates. So install it in other drives like D drive, etc by clicking the Change button.
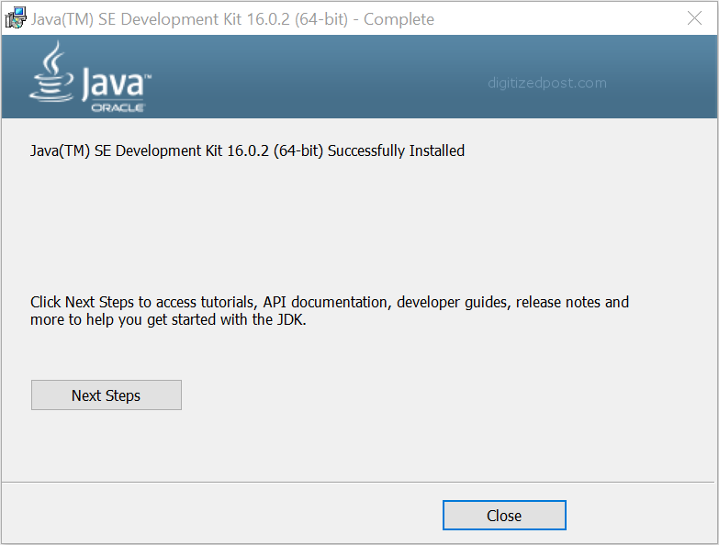
Step 4 Finish JDK Setup
When it is successfully installed close the window. Clicking Next Steps will take you to the documentation page.
Step 5 Check JDK Version
After installation is complete, open the command prompt.
In the command prompt, verify the JDK is installed or not by entering the command,
java -version
This command will help you check JDK is successfully installed or not and to find JDK version.
Step 6 Check Install Path
As we chose 64 bit installer JDK will be installed in the C:\Program Files\Java destination folder. Check it both has JDK and JRE. You will find only JDK and there won't be JRE.
Till Java 8 you have an option to download JRE separately. From Java 9 onwards, Oracle doesn't provide a separate JRE. You have to create a Custom JRE using jlink tool.
So there is no separate JRE 16 available for download.
Step 7 Set Environment Variable
In Environment variables check java path is set. You have to also set the JAVA_HOME to open editors like eclipse.
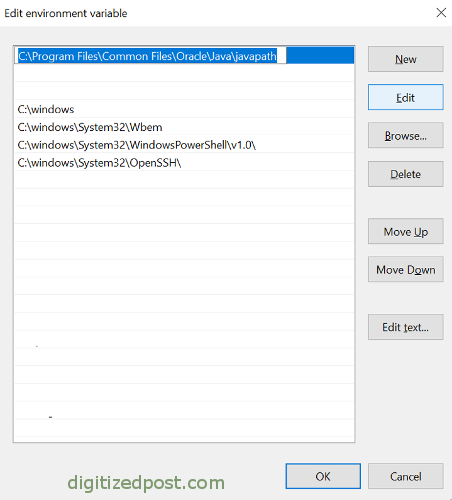
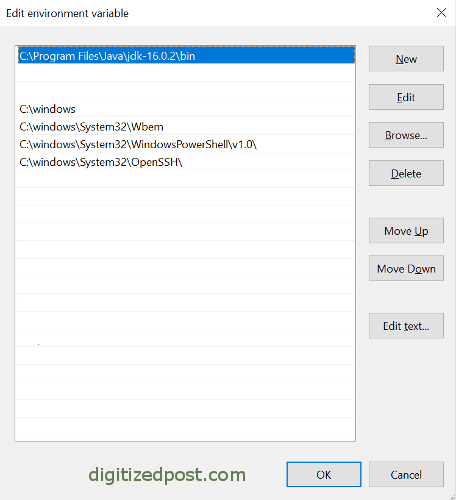
The Default JDK path is set to C:\Program Files\Common Files\Oracle\Java\javapath. You need to change it to C:\Program Files\Java\jdk-16.0.2\bin
Below is the default path set during the standard installation. Click Edit to change it.
Copy the JDK bin path and replace the existing path.
To verify the edited path is reflecting, open command prompt and type,
echo %PATH%
This should show the new JDK path, otherwise sign out your system and check it again if it reflects. If the signout option is not there use the restart button. Signout will be faster than restart.